

Last updated: 11 May 2026
In a hurry? TL;DR:
- Match mirror to table: aim for around two-thirds of the dressing table width so it looks balanced and stays usable.
- Prioritise even light over “brightest”: dimming and low glare reduce shadow decisions and over-application.
- Use a 3-zone surface system: prep, work, reset. The surface stays calm, tools stop vanishing.
- Small bedroom: go slim, go vertical, store everything except the daily kit.

Dressing Table Vanity Setup That Actually Works: Lighting, Layout, and Storage
Consolidation only works if you earn it. “One big page” does not automatically rank better. The master page has to satisfy multiple intents at once: setup guidance, buying clarity, small-bedroom constraints, design cues, and practical maintenance. So this article is structured like a system. You can skim to your exact problem, but it still reads as one coherent guide.
⚡ PRO INSIGHT: If your lighting makes you second-guess your base, too warm, too harsh, too shadowy, you compensate with more product. Consistent, dimmable light usually reduces over-application and speeds the routine.
Step 1: Choose the right spot before you buy anything
Best case: position your dressing table near a window, but not in direct sun. Natural light is useful for a quick cross-check, but it changes by hour and weather. The goal is a repeatable baseline you can trust daily.
If your room is low-light or windowless: treat your vanity mirror with lights as the primary task light. Avoid overhead-only lighting because it throws shadows under the eyes and chin. Interior designers make a similar point about mirror lighting: light at the mirror is typically more flattering than harsh overheads, and dimmers help you balance atmosphere with practicality, as covered in House & Garden’s bathroom lighting ideas.
Step 2: Get the proportions right: mirror, table, chair
Most “something feels off” vanity setups fail on proportions. Use these rules of thumb first. Styling is easy once the geometry is right.
| Element | Rule of thumb | Why it matters |
|---|---|---|
| Mirror width | Around two-thirds of table width | Looks balanced and leaves surface space for tools and products. |
| Mirror height | Top edge at or slightly above eye level when seated | Reduces chin and under-eye shadows, avoids awkward neck angles. |
| Viewing distance | 30 to 45 cm for makeup, 45 to 60 cm for hair | Close enough for precision, far enough to keep perspective. |
| Chair height | Hips slightly above knees | You stop hunching forward, which changes how light hits your face. |

The 25% setup anchor
If the dressing table is your daily base, make the mirror do the hard work
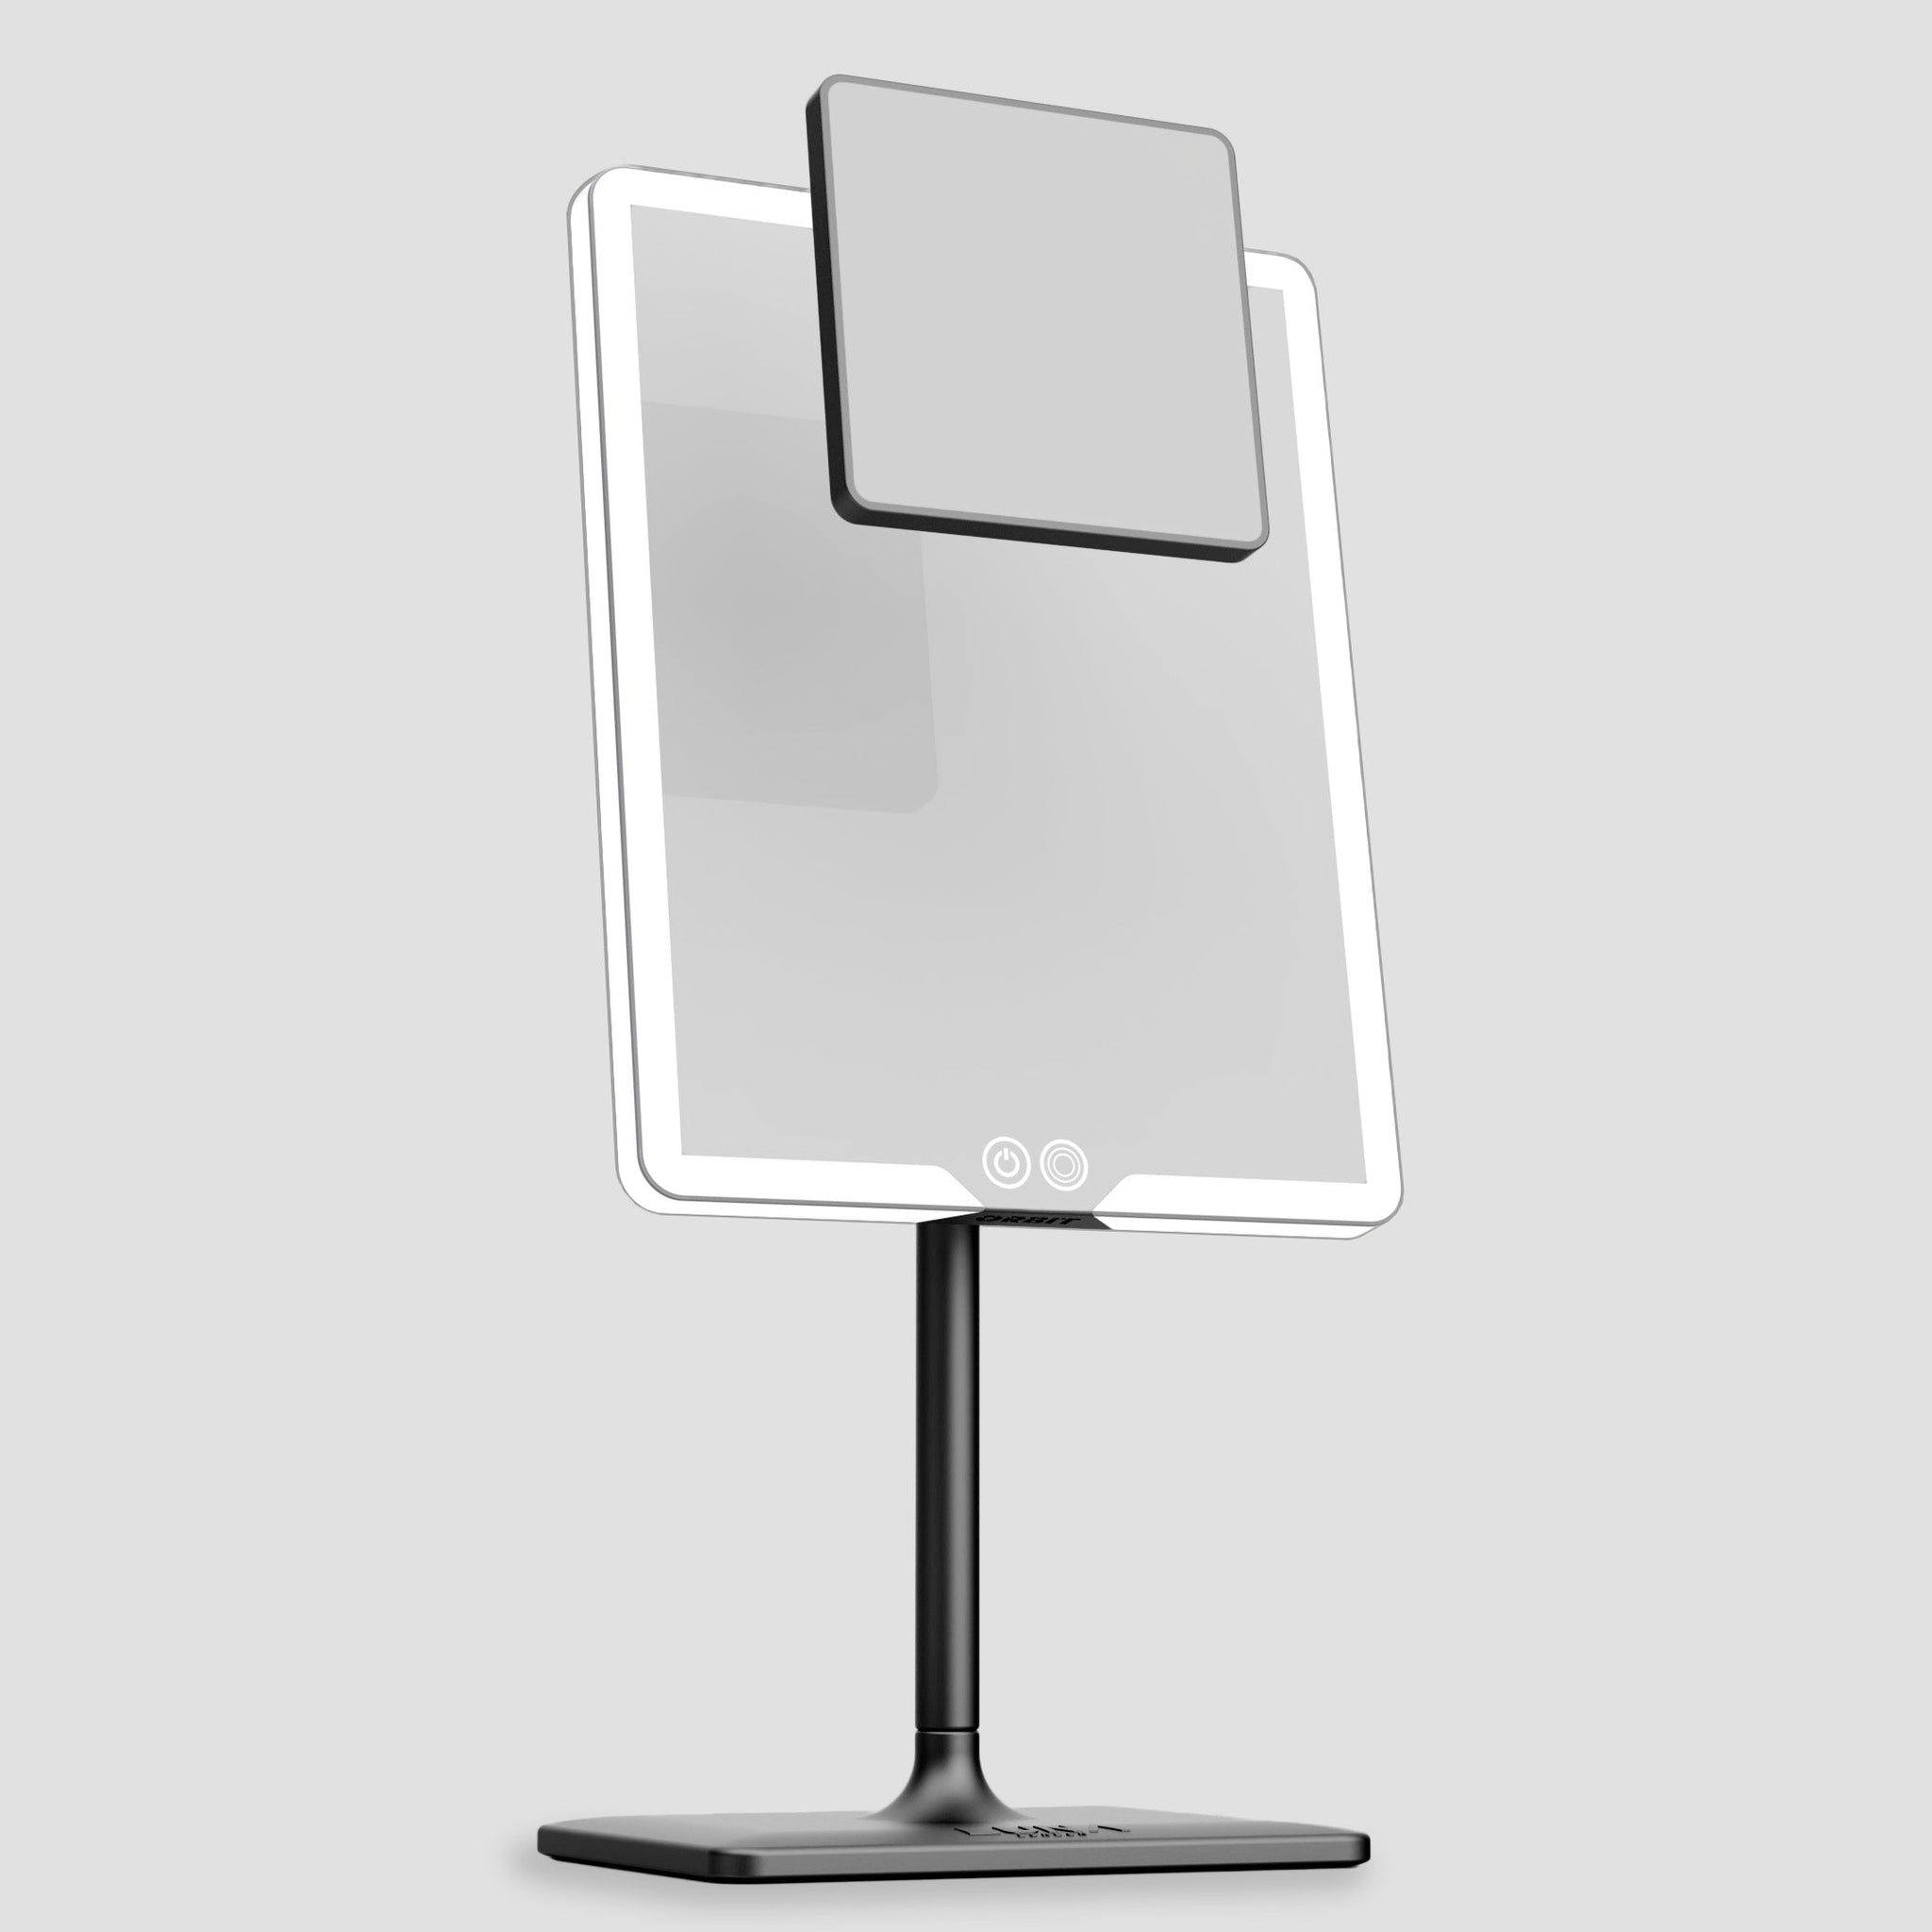
A good vanity setup starts with one stable light source at face level. ORBIT gives you a larger lit mirror face for the full routine, then a 7x magnification add-on when brows, lashes, shaving lines or small details need a closer check.
Step 3: Choose lighting that shows true tone, not just “pretty light”
Two concepts matter more than most people think:
- Colour temperature, Kelvin: warm feels cosy, cool feels crisp.
- Colour fidelity: how accurately the light reveals colour.
CRI is common, but organisations like the CIE note limitations of CRI for modern sources, while the Illuminating Engineering Society explains how TM-30 gives a more complete picture of colour rendition.
In practice, your dressing table wants even, low-glare light with the ability to dial brightness up for detail work and down for night routines. Let the mirror do precision, then keep the room lighting softer and secondary.
⚡ PRO INSIGHT: Pick one neutral baseline for application, then do a quick warm-light check if you go out at night. That catches the classic problem where warm bulbs hide blending issues that show up outside.
Small bedroom setup: big light, small footprint
Small rooms punish clutter and bulky footprints. The fastest win is to simplify the surface: one mirror, one tray, one container for daily tools. Everything else lives in drawers. Your vanity mirror with lights does double duty here. It brightens your face and visually expands the corner.

Luxury dressing table ideas that still stay functional
Luxury is not marble. It is clarity: the feeling that your routine is smoother, faster, and calmer because the lighting and layout do their job.
“They create atmosphere in the bathroom… and they make your face look fab.”
Sarah Stewart-Smith, designer, quoted in House & Garden.
Three styling ideas survive real life:
- One anchor object: the mirror, plus one texture such as a linen runner, ribbed tray, or brushed metal cup. More than that tends to become clutter.
- Hide the boring items: cotton pads, spare sponges and hair ties belong in a drawer organiser so your surface stays clean.
- Balance warm and neutral: the mirror handles precision, room lighting handles mood.
Organisation: the 3-zone vanity system
People often upgrade the mirror and still hate the setup because the surface is chaotic. A simple system fixes that. Think zones, not piles.
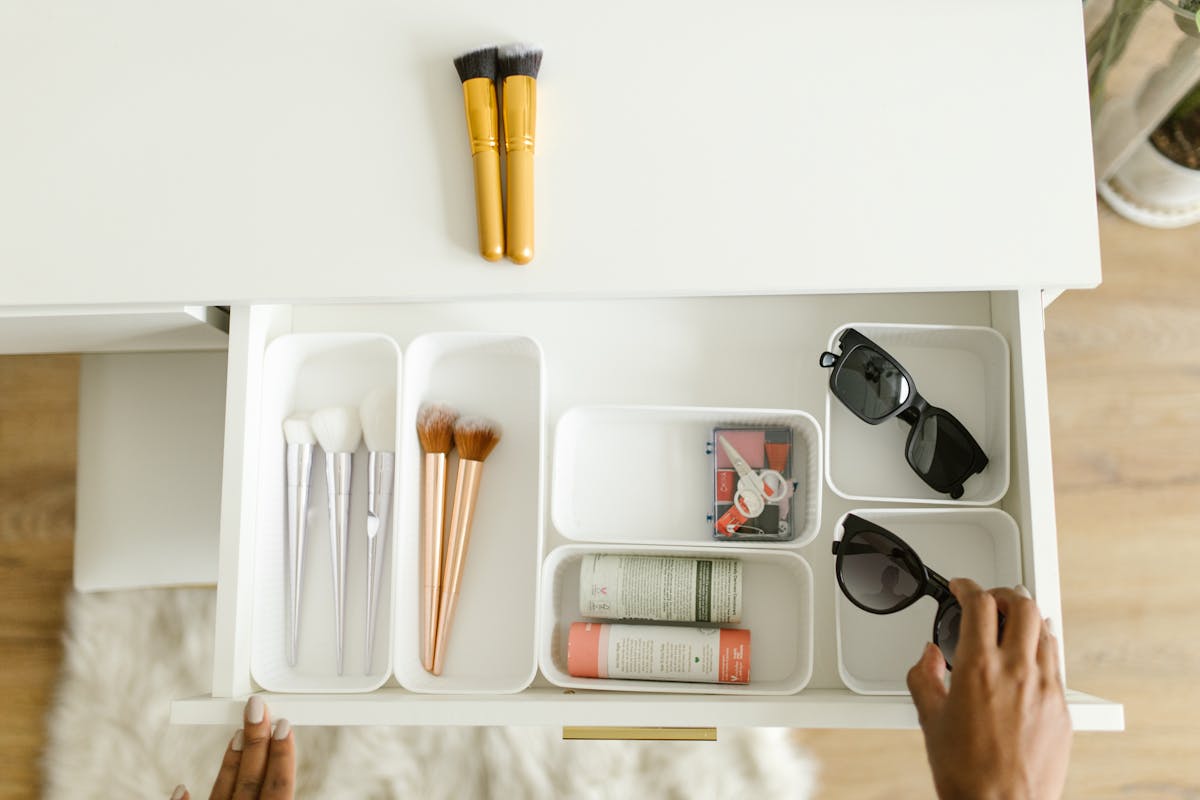
| Zone | What lives here | Rule |
|---|---|---|
| Prep | Cleanser, moisturiser, SPF, tissues | Everything you touch first stays within one arm’s reach. |
| Work | Daily kit only | One tray only. If it does not fit, it does not belong. |
| Reset | Brush cup, microfibre cloth, bin | Two-minute reset after use so tomorrow starts clean. |
Small but underrated: the wider bedroom environment affects routine quality too. If you want the “why” behind calmer spaces, the Sleep Foundation’s bedroom environment guide is a useful starting point.
Airbnb and temporary setups: build a portable vanity in 5 minutes
Hotel and Airbnb lighting is unpredictable. The point of a portable vanity plan is to recreate a repeatable baseline anywhere.
- Choose one surface: desk, dresser, or a clear shelf. Avoid cramped bathroom counters.
- Bring your baseline light: a mirror with built-in lighting is more predictable than whatever bulbs the property has.
- Pack one organiser pouch: keep it small so you actually reset it each night.
The 65% portable setup fix
When your vanity is a desk, shelf or hotel counter, bring the light with you
ECLIPSE is the better fit when the problem is temporary lighting rather than a full dressing table. It folds flat, gives you 3 LED brightness settings, and helps you create a cleaner getting-ready zone in hotels, Airbnbs, work trips and shared bathrooms.

Vanity mirror history, briefly: why lighting became the modern upgrade
Vanity rituals are not new. What changed is reliability. Victorian dressing tables were about storage and ceremony. The modern upgrade is consistency: a mirror that stays bright, colour-stable, and usable at the same angle every day.
Why vanity mirrors with lights feel “sold out” lately
- Lighting mismatch anxiety: people are tired of makeup looking different in every mirror and room.
- Hybrid life: video calls, commuting and social plans push people toward a controllable baseline light.
- Gifting intent: “vanity mirror with lights” is a classic practical-luxury gift query, especially when buyers do not know shades or skincare routines.
Choosing the one mirror: a quick decision table
If you also create content or take lots of selfies, it is worth understanding the trade-offs between face-lit tools. Our comparison of vanity mirrors with lights vs ring lights covers when a mirror beats a ring light and when they can work together.
| Use-case | What to prioritise | Here’s Our Favourite | Why it fits |
|---|---|---|---|
| Home dressing table | Stable angles, adjustable lighting, full-face view | ORBIT | Built for tabletop routines, plus a 7x magnetic attachment for detail work. |
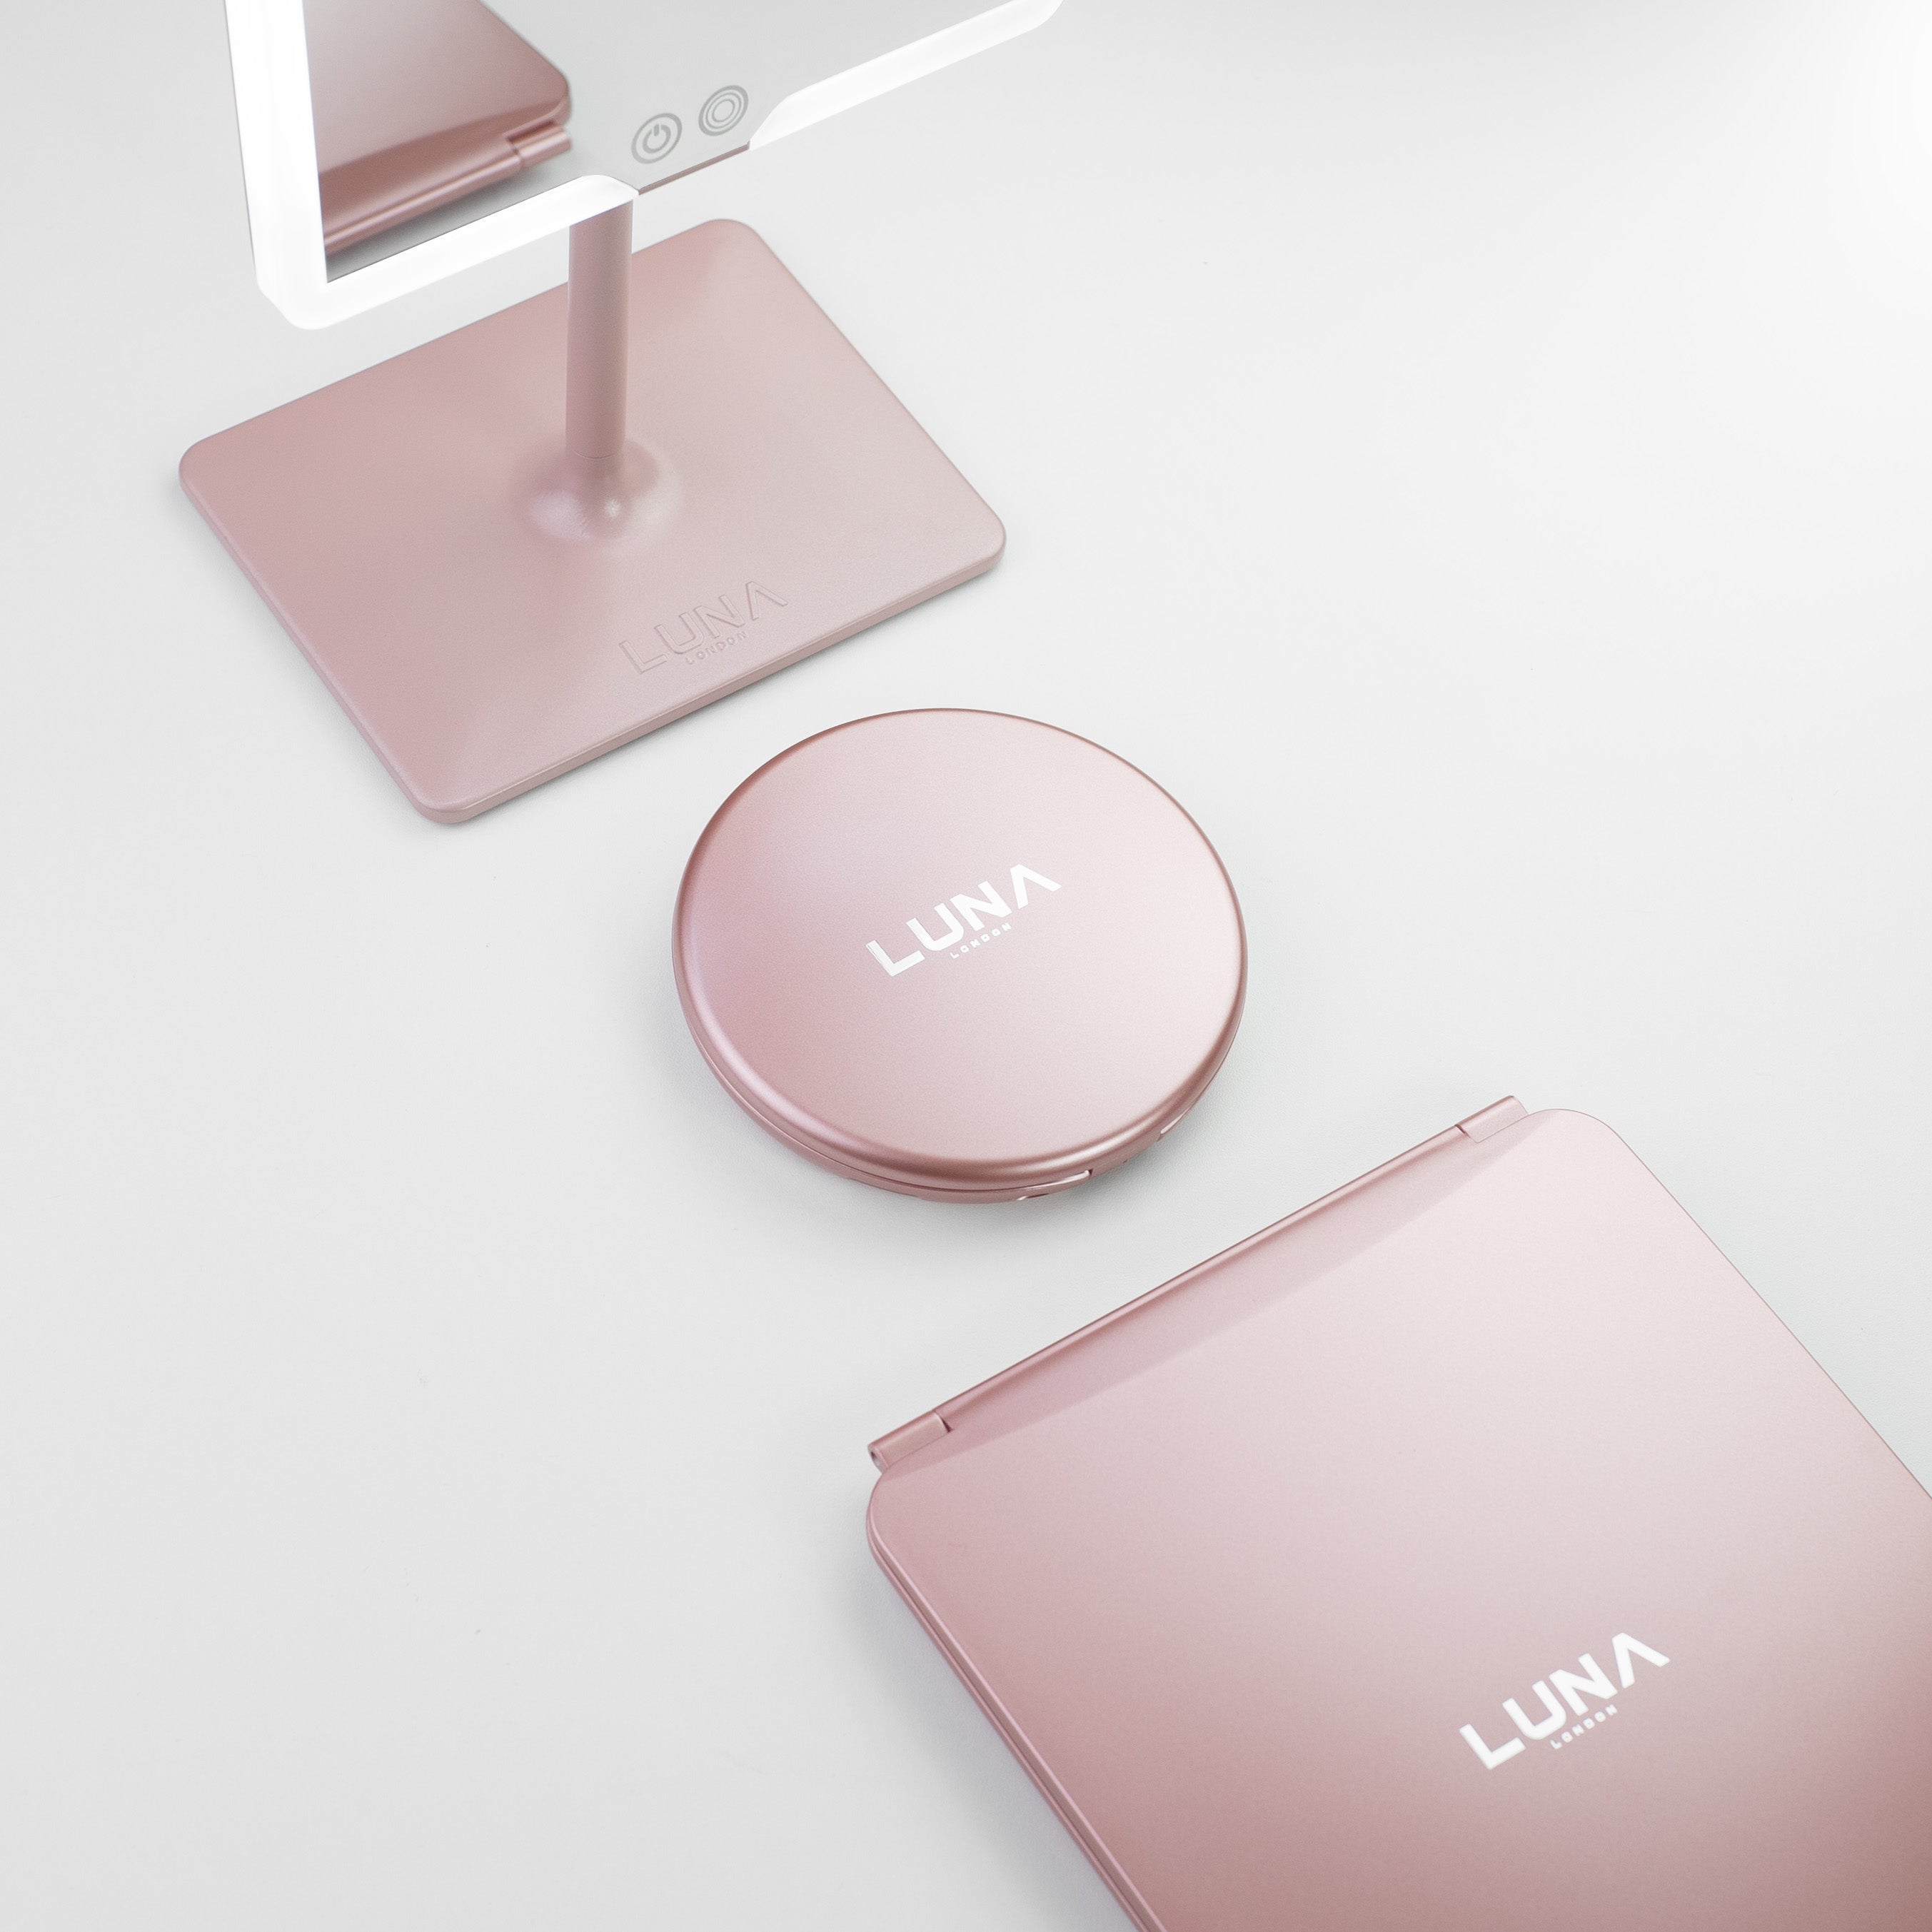
| Small bedroom or shared space | Slim footprint, easy storage, strong task light | COMPACT 2.0 | Portable, space-saving, includes a 7x magnification mirror for quick precision. |
| Travel and on-the-go touch-ups | Packable, reliable lighting, quick resets | ECLIPSE | A compact travel mirror with lighting built for hotels, commutes and fast touch-ups. |
Maintenance: keep the mirror and the light accurate
- Weekly: wipe the mirror with a dry microfibre cloth, then a tiny amount of glass cleaner sprayed onto the cloth, not the mirror.
- Monthly: dust around the light area and base so brightness stays even.
- Every routine: do a two-minute reset, put tools back, wipe the surface and bin cotton pads.
If makeup is your priority and you want lighting-specific technique help, read our guides to preventing cakey makeup with better lighting and the real difference between light-up mirrors and LED mirrors.
A calmer dressing table starts with one reliable light
The best vanity setup is not the one with the most products on display. It is the one that makes tomorrow morning easier. Choose the right mirror size, set one repeatable light baseline, and keep the surface clear enough that your routine can actually happen without hunting for tools.
Final dressing table pick
For a proper vanity setup, ORBIT is the cleanest place to start
If you are building a dedicated dressing table rather than a quick travel kit, ORBIT gives you the larger mirror face, adjustable lighting, stable angles and 7x magnification add-on that make daily routines easier to repeat.
Which LUNA mirror fits your setup?
| Mirror | Best for | Key features | Why it stands out |
|---|---|---|---|
|
|
ORBIT Dedicated dressing tables, daily makeup, grooming and close-up checks. |
7x magnification add-on, 3 LED brightness settings, USB C rechargeable. | Shop ORBIT |

|
COMPACT 2.0 Small bedrooms, handbags, quick detail checks and portable precision. |
7x magnification mirror, 3 LED brightness settings, USB C rechargeable. | Shop COMPACT 2.0 |
|
|
ECLIPSE Travel, desks, hotel rooms and lighting-only touch-ups. |
Fold-flat design, 3 LED brightness settings, rechargeable travel format. | Shop ECLIPSE |
Quick tracked delivery available in:
 USA
USA
 UK
UK
 EU
EU
FAQs
What size vanity mirror is best for a dressing table?
A reliable starting point is a mirror around two-thirds the width of your dressing table. It looks balanced and leaves space for daily tools.
Is a vanity mirror with lights better than a lamp?
For precision tasks, yes. A mirror light keeps illumination close to your face and reduces shadows. A lamp still helps the room feel softer and less clinical.
What lighting colour is best for makeup?
Use a neutral baseline for application, then do a quick warm-light check for evenings. The goal is to avoid shade surprises when you leave the room.
Do I need magnification?
Only for detail tasks like brows, eyeliner, contact lenses or close shaving. Do not do full-face makeup in high magnification because it can distort perspective.
How do I set up a vanity in a small bedroom?
Go slim and vertical, store most items in drawers, keep only the daily kit on the surface, and let the mirror be the primary task light.
How should I apply SPF at a dressing table?
If you do skincare at your vanity, apply sunscreen as the final morning skincare step and use a mirror setup that helps you cover the hairline, ears and neck. The American Academy of Dermatology has a practical application guide.

Leave a comment
This site is protected by hCaptcha and the hCaptcha Privacy Policy and Terms of Service apply.