
Last updated: Wednesday 1 July 2026
Warm, cool or natural light for makeup: the fast answer
If your makeup looks smooth at home, then suddenly orange, grey, patchy or too heavy somewhere else, do not blame the foundation first. Blame the feedback. The light you use while applying makeup changes how you judge undertone, coverage, texture, brows, lip edges and powder.
The cleaner question is not “which light is best?” It is “which light is best for this part of the routine?” Natural or daylight-style light gives the most useful read on foundation and concealer. Cool light exposes detail, especially brows and liner. Warm light previews how your finished makeup will look in softer evening spaces.
If you are still deciding whether a dedicated mirror makes a practical difference, start with our guide to makeup mirror with lights vs regular mirrors. If your current setup includes filming or Zoom, the companion comparison on vanity mirrors with lights vs ring lights explains why camera-flattering light is not always the same as real-life accurate light.
| Light setting | Use it for | What makeup artists check | Where people go wrong |
|---|---|---|---|
| Natural / daylight-style light | Foundation match, concealer balance, true coverage, jawline checks | Does the base disappear into the neck? Is concealer too bright? Is coverage only where it is needed? | Assuming one changing window is enough for the whole routine |
| Cool light | Brows, eyeliner, lash roots, lip edges, texture and short precision checks | Are brow tails even? Are liner edges clean? Has powder caught around texture? | Over-correcting blush, bronzer or foundation because the light feels harsh |
| Warm light | Evening makeup, restaurants, bedrooms, low-lit bathrooms and final soft-focus preview | Does the face still look balanced? Has bronzer gone too warm? Does blush still read? | Shade matching in flattering light that hides errors |
⚡ PRO INSIGHT: Flattering light is useful at the end. Truthful light is what you need at the start. If you begin in warm light because it feels kinder, you can keep a base that is already too warm, too yellow or too heavy.
Best for the full lighting workflow
Choose ORBIT if you want one stable place to test warm, cool and daylight-style light
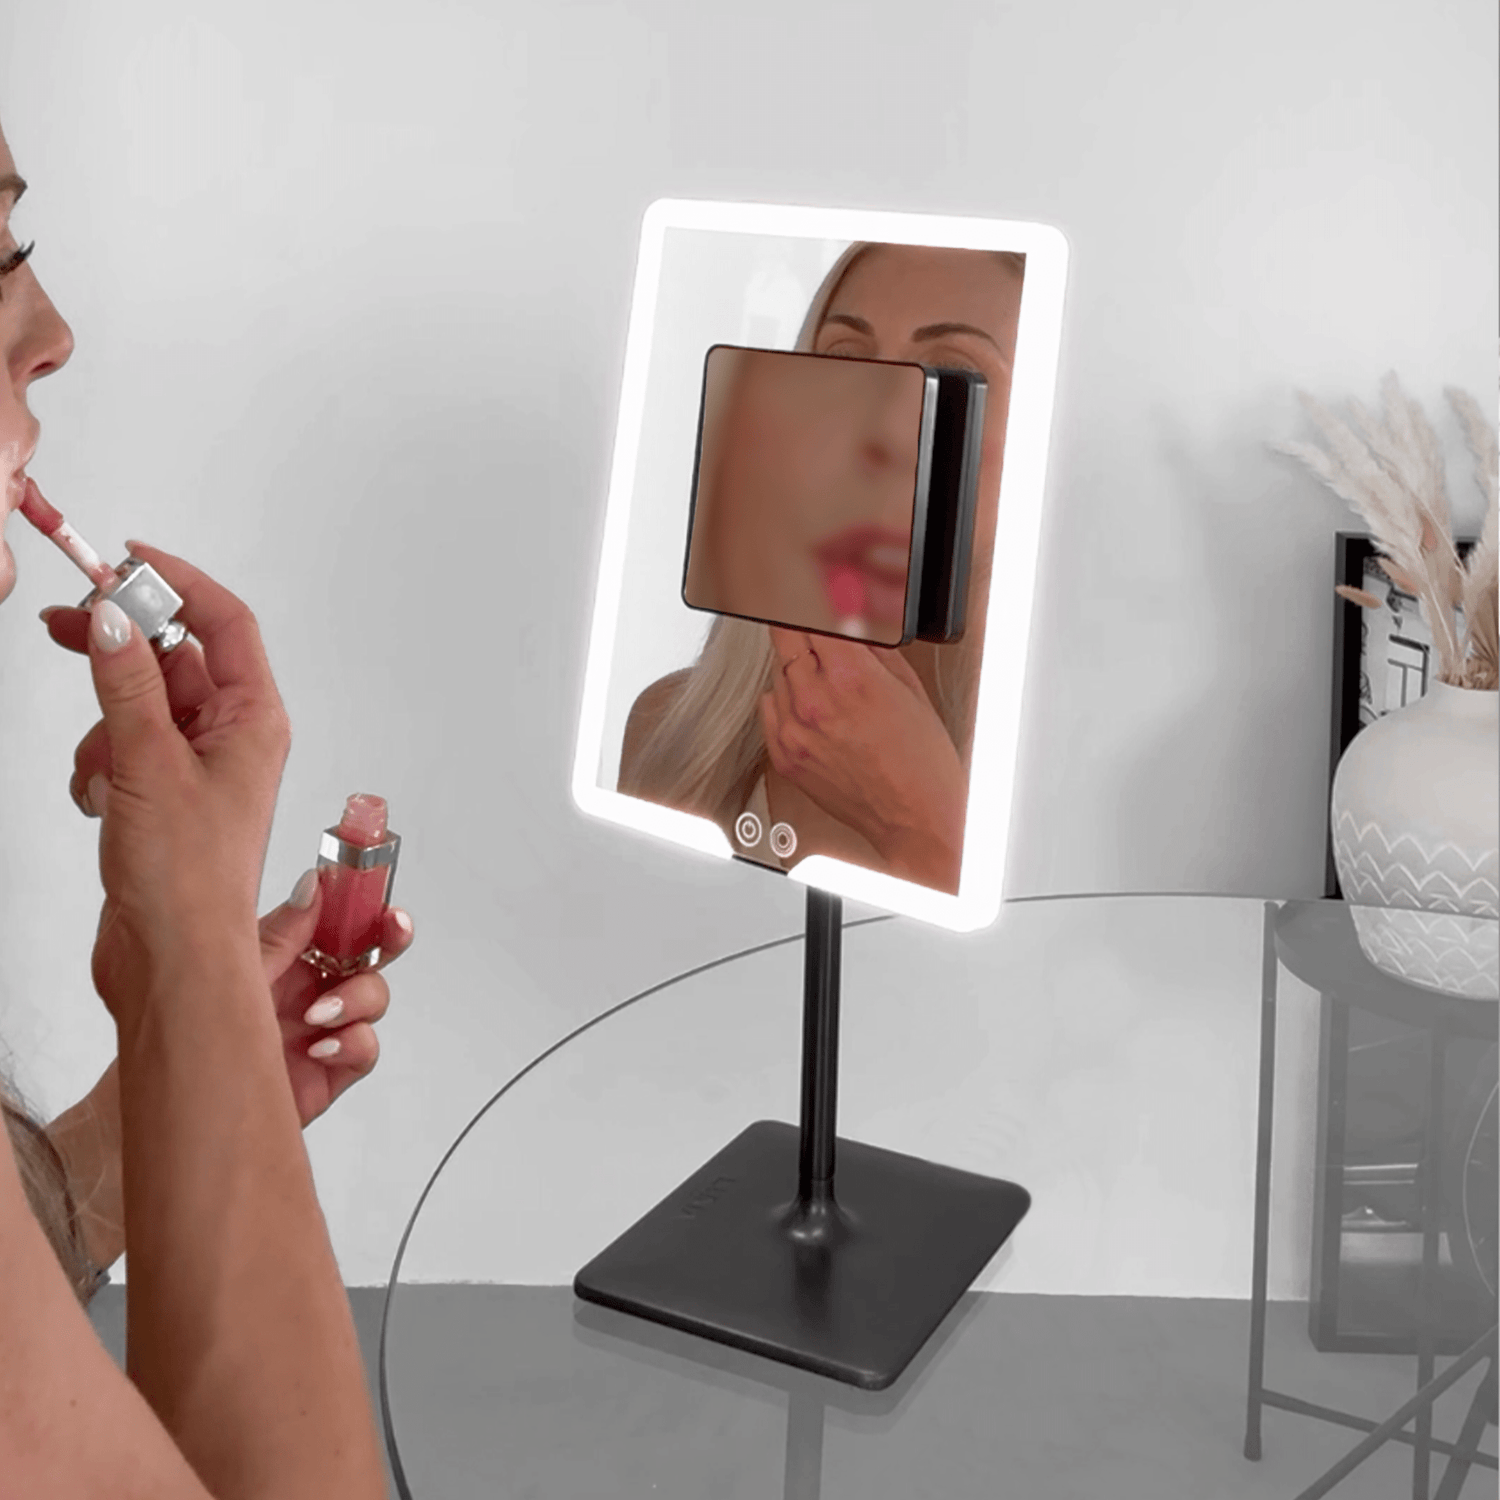
A lighting selector only works if the mirror gives you repeatable feedback. ORBIT is the strongest fit for home routines because you can check the full face first, then use the 7x magnification add-on briefly for brows, liner or lip edges.

| Best for | Foundation match, blending, brows, evening preview |
| Why it helps | 3 LED brightness settings plus a stable tabletop view |
| Use carefully | Use 7x only for detail, not for judging your whole base |
Natural light is the baseline, but it is not the whole answer
Natural daylight remains the safest place to start because it gives the clearest read on undertone and coverage. In Marie Claire UK’s guide to makeup for bad lighting, the same practical theme comes through: the problem is rarely just the product, it is the lighting environment changing how skin, tone and texture appear.
Daylight helps you see whether foundation disappears into the skin, whether concealer is too bright, and whether the base is sitting too heavily around the nose, chin or jawline. It is especially useful for foundation shade match because undertone errors usually show first where the face meets the neck.
“Natural daylight is always the most honest place to begin.”
— Lulia David, photographer, Marie Claire UK
But “just use daylight” is lazy advice if you get ready in a bathroom, on dark mornings, during winter, before an evening event or while travelling. Window light shifts with weather, time and direction. A better system is to treat daylight-style light as your anchor, then check the details and the final mood separately.
If you want the skincare version of this same problem, our LED mirror vs natural light skincare guide explains when daylight is useful and when consistent front-facing light matters more.
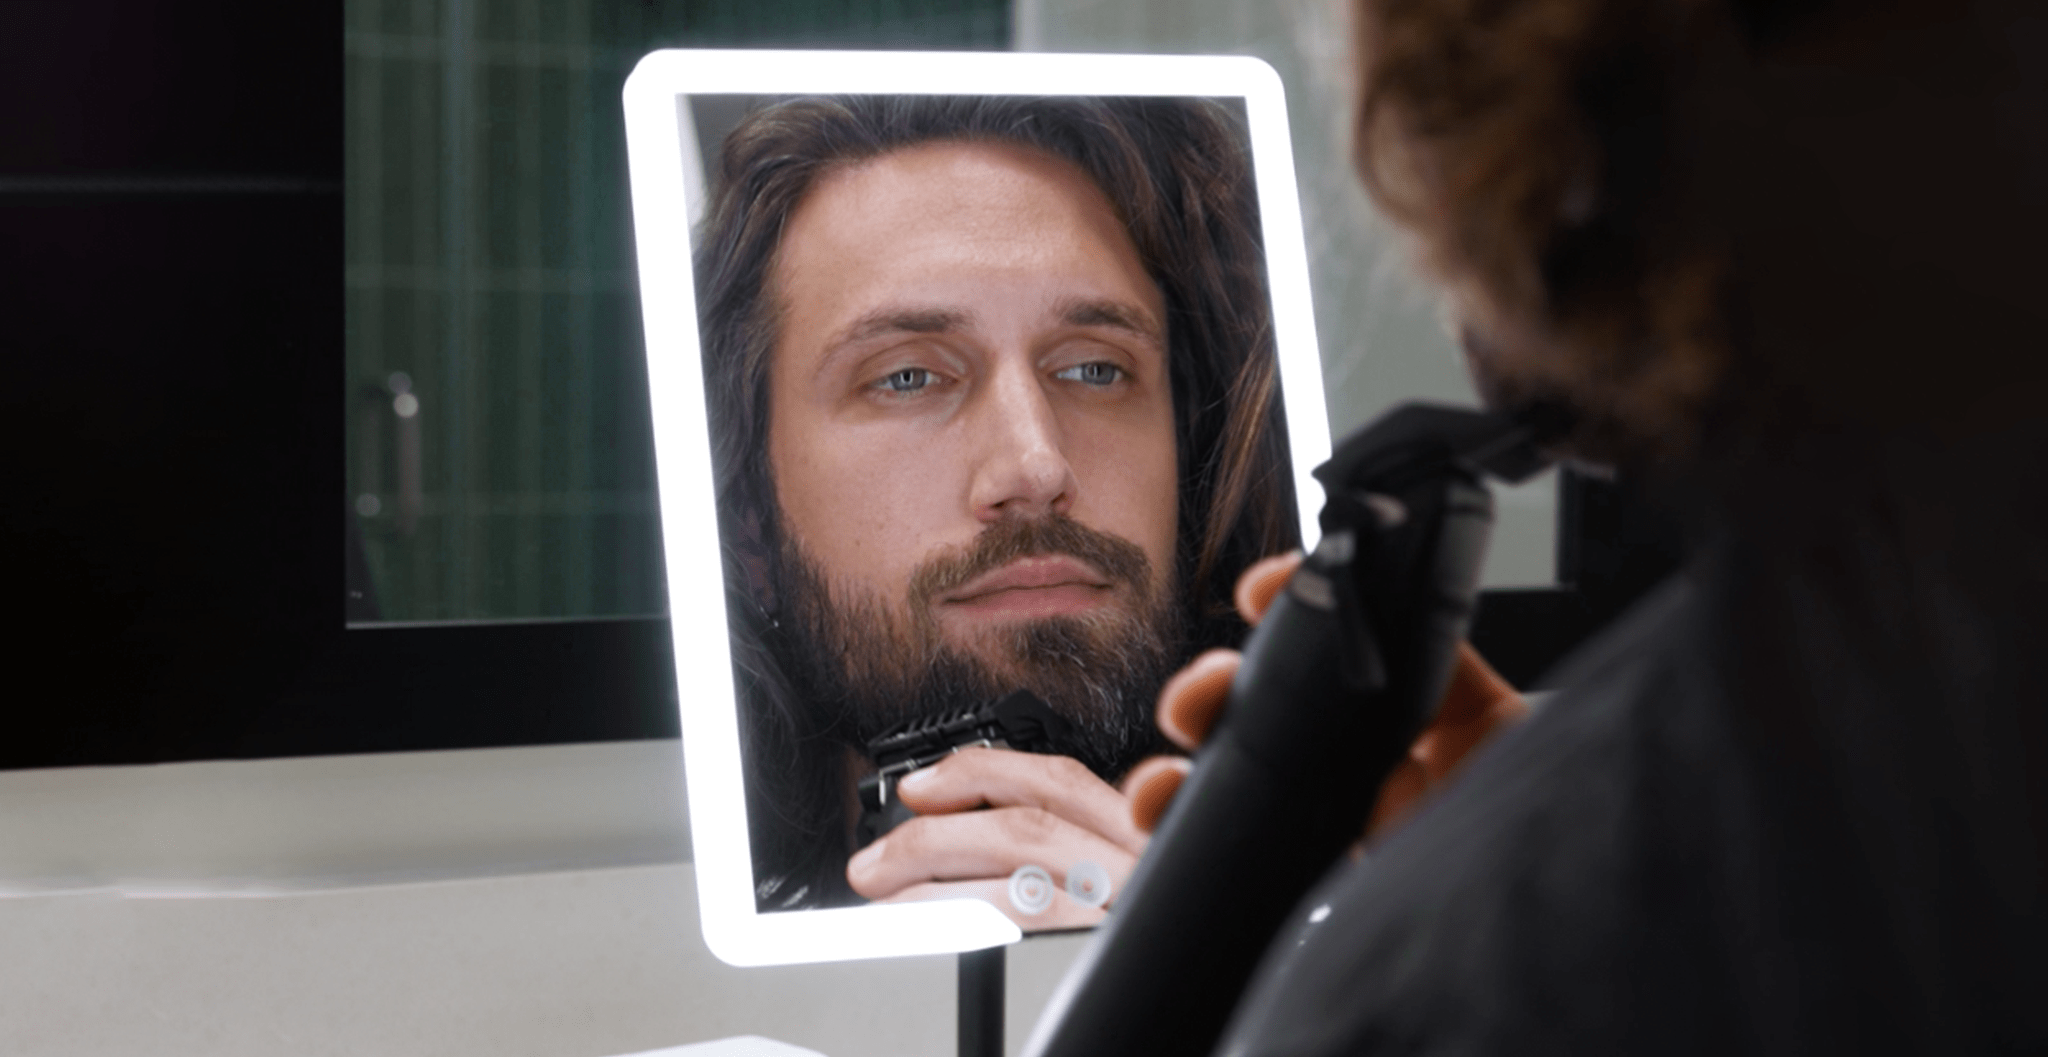
Cool light is for detail, not emotional decision-making

Cool light is not bad. It is just easy to misuse.
It is brilliant for short, controlled checks: brow tails, liner symmetry, mascara roots, lip edges, stray hairs, dry patches and small blending errors. It is also helpful for sharper eye looks, where defined structure survives harsh light better than a very soft, blurred shape.
What cool light does badly is emotional decision-making. It can make skin look flatter, greyer and more textured than it really is. That is when people start fixing a face that was mostly fine by adding more bronzer, more blush, more powder or another layer of foundation. That is how a patchy base turns into a cakey base.
⚡ PRO INSIGHT: Use cool light like a quality-control lamp. Switch it on, inspect, correct one or two things, then switch out of it. If you stay in it too long, you start solving the wrong problem.
Warm light is your final preview, not your truth source
Warm light has a job too. It is closer to what many people see in restaurants, bedrooms, hotel bathrooms and softer evening environments. That makes it useful for the final 10-second preview: does the blush look harmonious, does bronzer feel too strong, does the whole face look softer and more balanced?
Where people get into trouble is using warm light first. Warm light can forgive a too-warm foundation, hide redness, soften powder texture and make an overbuilt base look more polished than it really is. If your makeup only looks good in warm light, it has not been checked honestly enough elsewhere.
This is also why hotel bathroom lighting causes so much confusion. It is often mood-first, not accuracy-first, and it can make you either under-apply because everything looks soft or over-apply because shadows sit in the wrong places.

For hotel rooms, desks and away days
When the room lighting is not yours, bring a light you can trust
ECLIPSE is the better fit when portability matters more than a full-size setup. It folds flat, travels easily and gives you 3 LED light settings for hotel bathrooms, desk touch-ups and overnight stays. No magnification claim, just portable light when the room is not helping.
What makeup artists actually check in each light
The mistake most people make is treating light as a vibe. Makeup artists treat it as a diagnostic tool. Each light answers a different question.
| Makeup step | Check in this light | What to look for |
|---|---|---|
| Foundation match | Natural or daylight-style light | Check the jawline and neck together. If the face looks separate from the neck, the shade or undertone is off. |
| Blending | Natural first, cool briefly | Look around the nose, chin, under-eyes and hairline. Correct edges only, do not add another full layer. |
| Brows and liner | Cool light | Check symmetry, tails, gaps and sharpness. Then step back into normal light before making anything darker. |
| Evening makeup | Warm light | Preview whether blush, bronzer and lip colour still look balanced in softer lighting. |
| Hotel lighting | Portable neutral or daylight-style light | Use one known reference point instead of trusting the bathroom mirror alone. |
There is a useful science point underneath this. NIST explains that lighting affects how we perceive colour, and that traditional measures such as CRI do not always map perfectly to how people perceive modern LED light. For makeup, the practical lesson is simple: brightness alone is not enough. Direction, colour temperature and colour rendering all affect the mirror check.
The US Department of Energy’s background guide to ANSI/IES TM-30 colour rendition makes the same broader point in technical lighting language: better colour evaluation gives more useful information than old one-number thinking. You do not need to calculate TM-30 at your dressing table, but you should stop assuming that “bright” automatically means “accurate”.
The real fix for patchy foundation is usually better feedback
Patchy foundation, cakey powder, grey-looking skin and disappearing blush often look like separate problems. In practice, they are usually the same problem showing up in different ways: bad light made you misread the face.
| If you notice... | It is often caused by... | What helps most |
|---|---|---|
| Foundation looks patchy around the chin or nose | Overhead shadows and uneven blending feedback | Face-level daylight-style light and a jawline check |
| Makeup turns cakey by lunch | Over-applying base or powder in harsh cool or dim warm light | Use natural light for base decisions, then only brief detail checks |
| Shade looks fine at night, wrong in daylight | Matching in warm indoor light | Match foundation in natural or daylight-style mode first |
| Eye makeup disappears or goes muddy | Too-soft placement under poor lighting | Use cool light briefly for shape and edge checks |
If this is your recurring issue, the deeper companion piece on makeup mistakes under bad lighting breaks down the correction errors people make once the room has already thrown them off.

A simple 3-step light routine that works for day and night
- Start in natural or daylight-style light. Do skincare, primer, foundation and concealer here. This is where you decide undertone, match and where coverage is actually needed.
- Switch briefly to cool light. Check brows, liner, mascara roots, lip edges and any visible texture. Make small corrections only.
- Finish in warm light. Do one final preview for the place you are actually going. This is where you decide whether the finished look feels too sharp, too powdery or too cold.
For holidays, weddings, festivals and work trips, use the same sequence with less product. Our refreshed best travel makeup mirror guide goes deeper into hotel lighting, carry-on routines and why a portable mirror should earn its bag space before you pack it.
Which LUNA mirror fits this job best?
If you want one stable place to move through all three checks at home, ORBIT is the cleanest fit for this article’s intent. Its lighting modes support the warm, cool and daylight-style workflow, and the 7x magnification add-on is there when you need detail work without forcing you to do your whole face magnified.
ECLIPSE is the clean portable option when you want reliable three-mode lighting for hotels, desks and overnight stays without magnification. COMPACT 2.0 is more about handbag precision and portable 7x checks, but for this lighting selector hub, ORBIT and ECLIPSE are the two clearest fits.
Final mirror check
If your makeup changes in every room, stop trusting one room
ORBIT gives you one stable place to test daylight-style, cool and warm light before you leave. Use the main mirror for overall balance, then the 7x attachment briefly for brows, liner or lip edges.
“The light really helped in our darker bathroom.”
Quick tracked delivery available in:
FAQs
Which light is best for applying everyday makeup?
Natural or daylight-style light is the safest starting point because it gives the clearest read on undertone, foundation match and coverage. Then use cool light briefly for precision work and warm light for a final preview.
Is warm or cool light better for mature skin?
Neither should be your only mode. Natural light is the most reliable baseline, cool light is useful for short detail checks, and warm light is kinder for the final preview because it does not exaggerate texture in the same way harsh cool light can.
Why does my foundation look orange in one room and grey in another?
Different rooms change colour temperature, light direction and colour rendering. The problem is usually not the foundation alone. It is matching and blending under light that distorts what you see.
How can I mimic natural light at night?
Use a daylight-style or neutral mirror mode positioned at face height with front-facing light. Avoid relying on a single ceiling bulb directly above the mirror, because overhead light can create shadows under the eyes, nose and jaw.
Does a ring light solve makeup lighting problems?
Not always. A ring light can be useful for filming, Zoom and camera-facing content, but a vanity mirror with lights is usually better for close-range accuracy when you are checking undertones, blend lines and texture.
Related links
- Makeup Mistakes Under Bad Lighting
- Makeup Mirror with Lights vs Regular
- Vanity Mirror with Lights vs Ring Light
- Best Travel Makeup Mirrors 2026
- Why Hotel Bathroom Lighting Is Failing You
- LED Mirror vs Natural Light for Skincare Routines
- ORBIT
- ECLIPSE
Leave a comment
This site is protected by hCaptcha and the hCaptcha Privacy Policy and Terms of Service apply.